If you’re craving a cookie that feels like a warm hug and bursts with fun, you’re going to adore this Strawberry Kiss Sugar Cookies Recipe. These soft, festive treats are the perfect blend of creamy, fruity, and sweet – plus, they come topped with that iconic Hershey’s Strawberry Ice Cream Cone Kiss. Let’s dive in and bake some happiness!

Jump to:
Why You'll Love This Recipe
I honestly can’t get enough of these strawberry-topped sugar cookies. They’re not just pretty—they’re the kind of cookie that makes you want to go back for seconds (or thirds!). If you want a festive treat that’s fun to make and impossible to resist, this recipe’s a winner.
- Totally fuss-free: Using Funfetti sugar cookie mix makes the dough super quick and foolproof.
- Soft and creamy: Cream cheese in the dough gives each bite that dreamy, melt-in-your-mouth texture.
- Playful toppings: The sanding sugar or non-pareils add just the right pop of sparkle and crunch.
- Perfectly festive: Those vibrant Hershey’s Strawberry Ice Cream Cone Kisses make these cookies a showstopper at any gathering.
Ingredients & Why They Work
To make these strawberry-kissed delights, I rely on a few simple but special ingredients that you can easily find in most stores. The key is picking a good-quality Funfetti sugar cookie mix for that perfect sprinkle-studded base and using softened cream cheese so it blends smoothly into the dough.
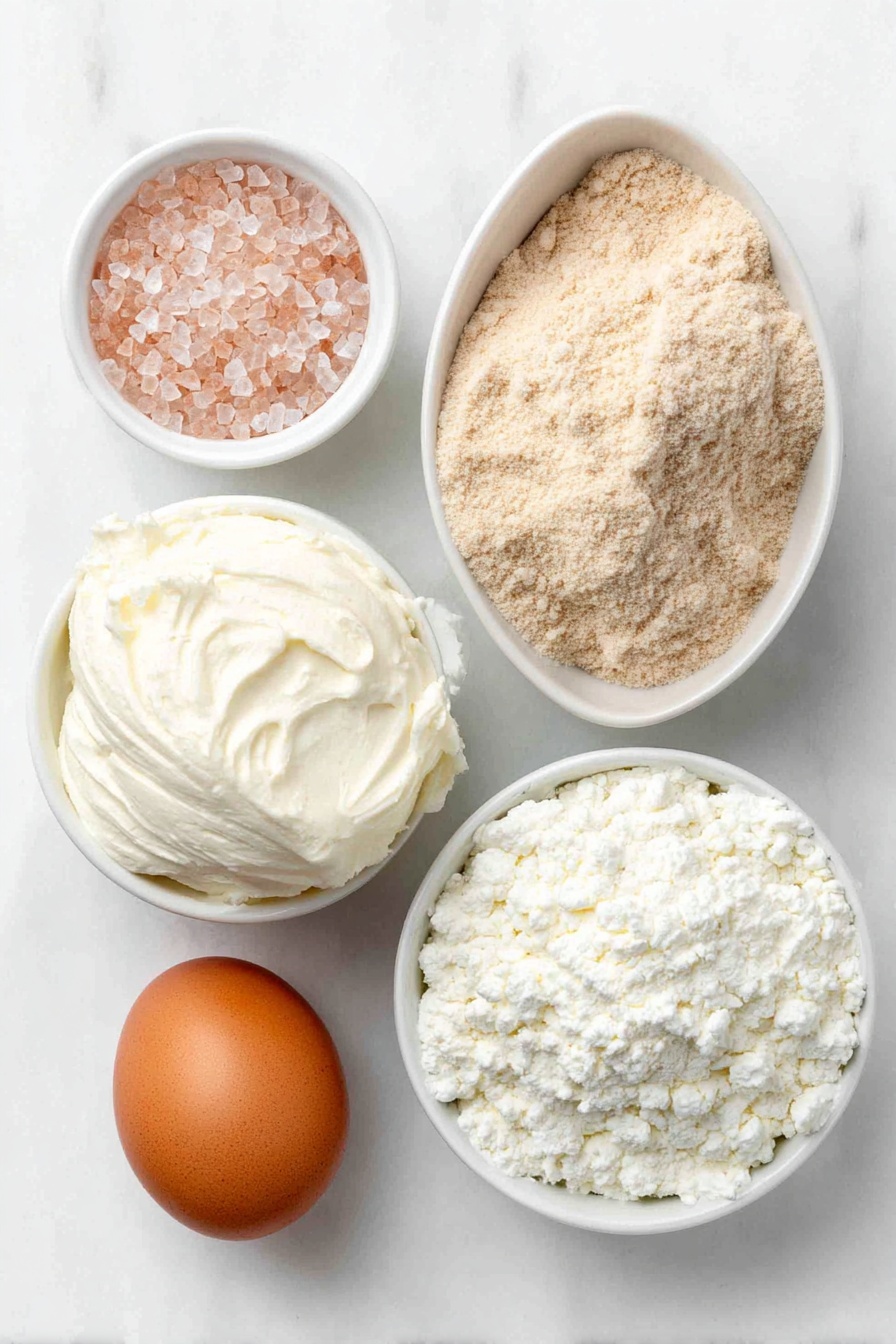
- Funfetti Sugar Cookie Mix: The fun sprinkles baked right into the dough bring that classic festive vibe and color.
- Cream Cheese: Adds moisture and richness, making the cookies soft and tender instead of dry.
- Large Egg: Binds the dough together and helps it rise just right in the oven.
- Pink or White Sanding Sugar or Non-pareils: Coats the dough balls to add a sparkly, crunchy texture and prevent stickiness while shaping.
- Hershey’s Strawberry Ice Cream Cone Kisses: These charming strawberry-flavored chocolates on top provide a sweet, melty finale that turns ordinary cookies into a celebration.
Make It Your Way
The beauty of the Strawberry Kiss Sugar Cookies Recipe lies in its flexibility. Whether you like them extra festive, softer, or with a little twist to suit your taste, these cookies invite you to put your own spin on them!
- Variation: I love swapping out the pink sanding sugar for vibrant non-pareils when I want more color and crunch. It adds a fun texture that my kids go wild for!
- Seasonal Twist: Around the holidays, I sometimes use red and green sanding sugar to make the cookies feel extra festive. It’s such an easy way to dress them up.
- Dairy-Free Option: For those avoiding dairy, try using a dairy-free cream cheese substitute. The dough's softness stays wonderfully intact and still pairs perfectly with the Hershey’s Strawberry Kisses.
- Chill It Out: If you prefer a firmer dough that’s easier to shape, refrigerate it for 30-60 minutes before scooping. This is especially helpful on warmer days or if your kitchen tends to be cozy.
Step-by-Step: How I Make Strawberry Kiss Sugar Cookies Recipe
Step 1: Preheat and Prep Your Space
Start by lining a large baking sheet with parchment paper to prevent sticking and ensure even heat distribution. Then, preheat your oven to exactly 375 degrees Fahrenheit. This temperature is perfect for baking the cookies through without overbrowning, giving you soft, delightful results.
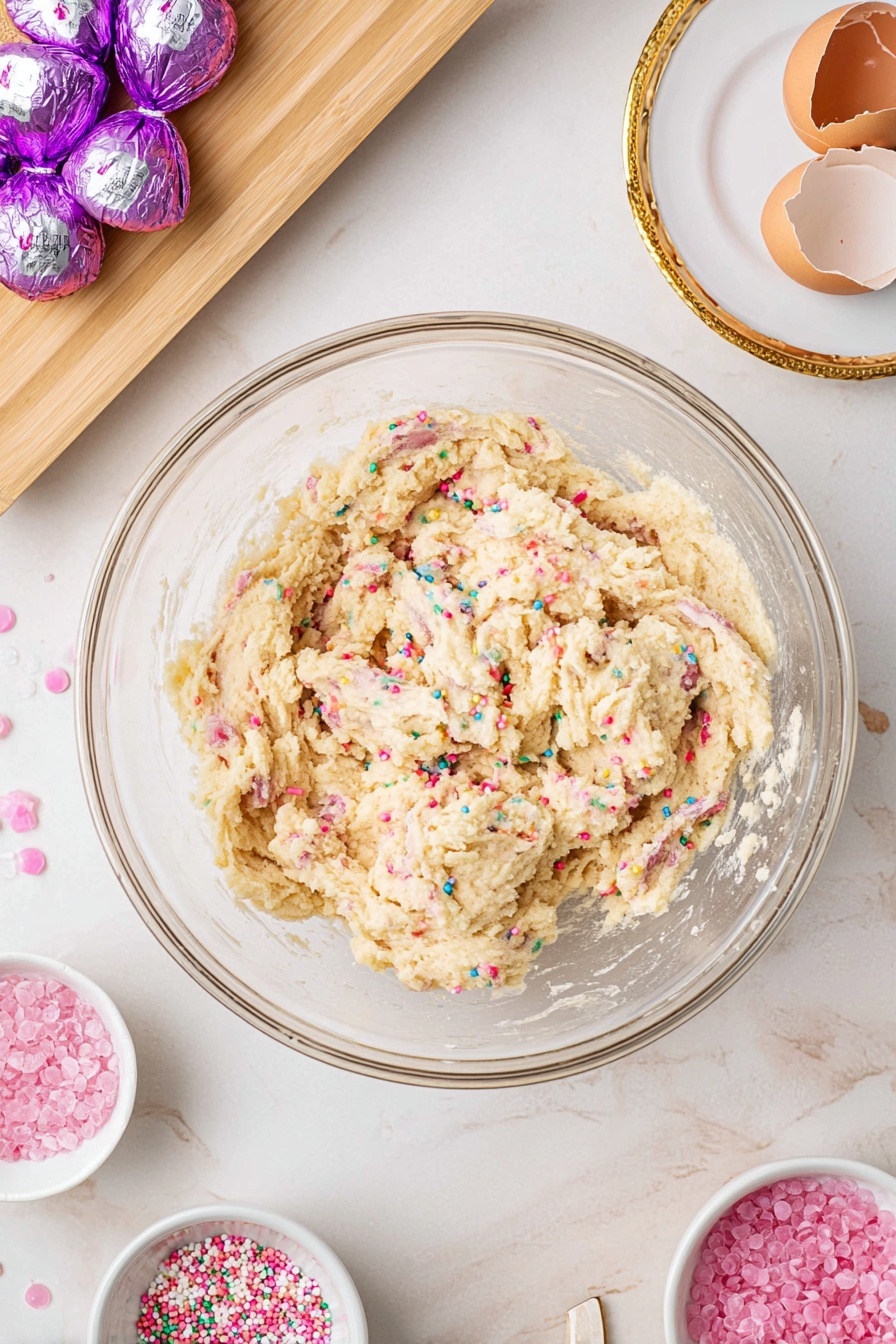
Step 2: Mix Your Magic Dough
In a large mixing bowl, combine your 16-ounce bag of Funfetti Sugar Cookie Mix with the softened 4 ounces of cream cheese and one large egg. Using a hand or stand mixer, beat everything together until you have a smooth, soft dough. You’ll notice the dough is slightly sticky – that’s totally normal and part of what makes these cookies so tender!
Step 3: Get Ready to Coat
Pour your choice of ½ cup pink or white sanding sugar, or non-pareils, into a shallow bowl. This colorful sugar coating will create the perfect sparkle or crunch on the outside of your cookies and help manage that sticky dough.
Step 4: Scoop, Roll, and Coat Your Dough Balls
Using a 1½ tablespoon cookie scoop, scoop out balls of dough. Drop them one by one into the sanding sugar or non-pareils, rolling gently to completely coat each ball and shape them into smooth, even spheres. If you find the dough too sticky to handle, pop it in the fridge or freezer for 30-60 minutes — it makes the rolling much easier without losing softness.
Step 5: Space Them Out and Bake
Arrange your coated dough balls on the parchment-lined baking sheet, spacing each about 1½ inches apart. This gives them room to spread just enough without crowding. Bake in your preheated oven for 12 minutes, or until the edges are set but the centers remain soft. You’ll catch a glimpse of golden edges—this is when you know they’re ready!
Step 6: Let Cool Before Adding the Star
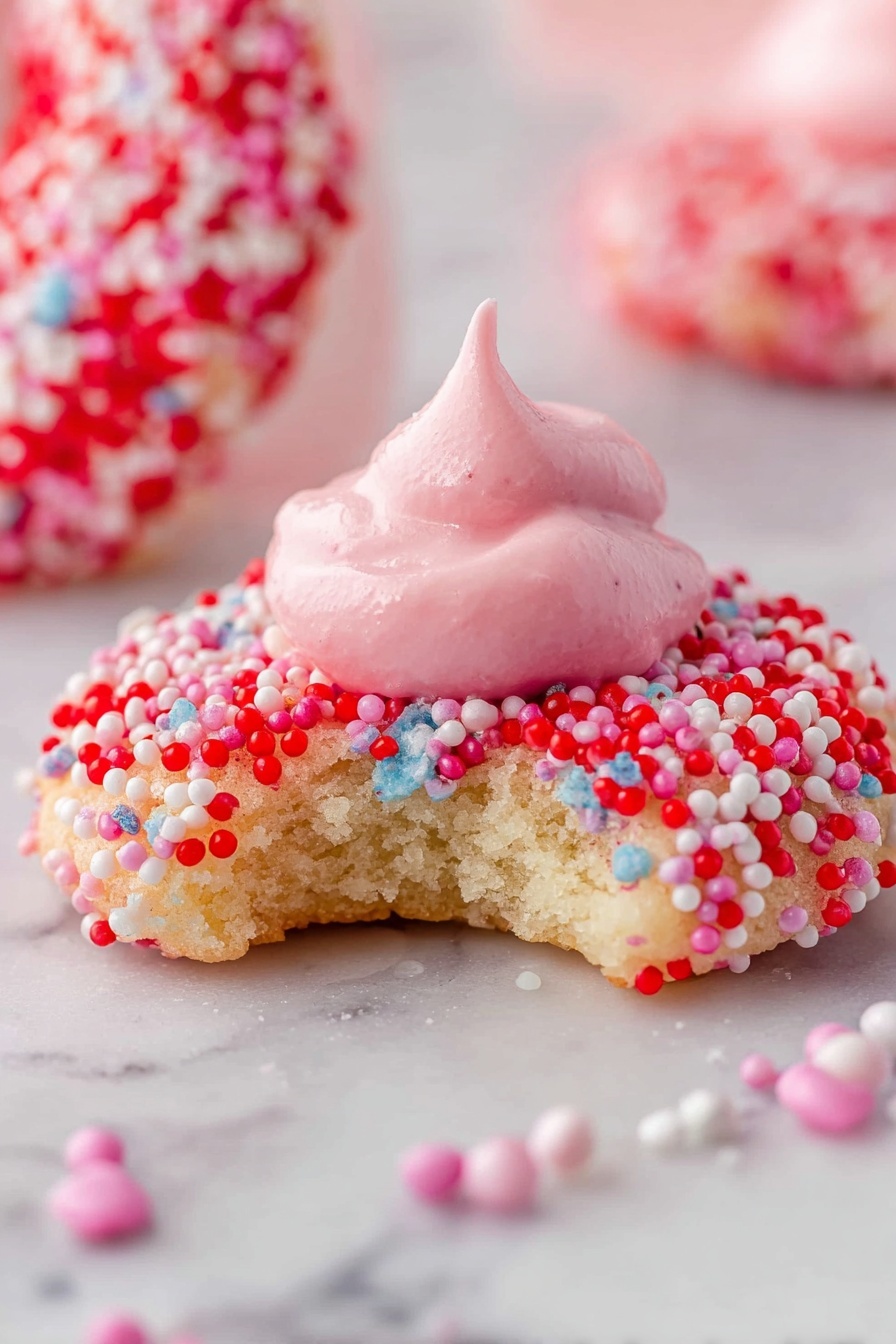
Once baked, let the cookies cool on the baking sheet for 3-5 minutes. This brief cooling allows them to set slightly but keeps them warm enough so that when you gently press an unwrapped Hershey’s Strawberry Ice Cream Cone Kiss into the center of each cookie, it melts ever so slightly for that signature gooey touch.
Step 7: Cool Completely or Enjoy Warm
Transfer the cookies to a cooling rack to cool completely if you want the Kisses to stay firm. Or serve them warm if you adore that melty, soft strawberry chocolate center—either way, these cookies are always a hit!
Top Tip
These tips are like little secrets to mastering the Strawberry Kiss Sugar Cookies Recipe. They’ll help you breeze through the process and get those cookies just right every time!
- Handle Sticky Dough with Ease: I found that chilling the dough for 30-60 minutes makes rolling the dough balls so much simpler and less sticky. Plus, lightly coating your hands and cookie scoop with sanding sugar works wonders to keep the dough from clinging.
- Perfect Kiss Placement: Don’t rush pressing in the Hershey’s Strawberry Ice Cream Cone Kisses—letting the cookies cool for 3-5 minutes before adding the Kisses gives you that perfect balance of soft, slightly melted chocolate without losing the kiss shape.
- Coating Choice Matters: I love using sanding sugar for that sparkling texture and a little help with handling sticky dough, but if you want extra crunch and color, non-pareils are a fun alternative—just keep in mind they don’t help with stickiness as much.
- Storage Strategy: Avoid sealing your cookies while warm! Trapping heat creates moisture and can deform those adorable strawberry Kisses. Let them cool completely before storing.
How to Serve Strawberry Kiss Sugar Cookies Recipe
Garnishes
If you want to dress up your Strawberry Kiss Sugar Cookies even more, try sprinkling a tiny bit of edible glitter for sparkle or add a delicate drizzle of white or pink chocolate over the top. Fresh strawberries or a dusting of powdered sugar nearby can also add a fresh, lovely touch.
Side Dishes
These cookies pair beautifully with a cold glass of milk, a cup of fruity herbal tea, or even some creamy vanilla ice cream for an indulgent treat. For a brunch spread or party, serve alongside fresh fruit platters or light finger sandwiches for a lovely balance.
Make Ahead and Storage
Storing Leftovers
After your Strawberry Kiss Sugar Cookies have completely cooled, store them in an airtight container at room temperature. They stay delicious for 3-4 days this way, retaining their soft texture and festive charm.
Freezing
To keep your cookies fresh longer, pop them in the freezer for 2-3 months. Just make sure they're fully cooled before freezing. When ready to enjoy, thaw at room temperature to bring back that melt-in-your-mouth softness.
Reheating
If you like your Strawberry Kisses a bit gooey, warm your cookies gently in the microwave for about 10-15 seconds. This quick reheat softens the chocolate just right without losing the cookie’s lovely texture.
Frequently Asked Questions:
The Funfetti sugar cookie mix gives the cookies their colorful, festive flair, but if you prefer, you can use a regular sugar cookie mix. Just know the sprinkle confetti won’t be there to brighten up the dough.
No worries! Refrigerate or freeze the dough for 30-60 minutes before scooping and rolling. This chill time makes handling much easier. Also, lightly coating your hands and scoop with sanding sugar can help keep stickiness at bay.
It depends on the texture you want. Pressing Kisses in immediately when the cookies are hot lets the chocolates melt softly for a gooey center. Waiting 3-5 minutes leads to a softer Kiss that still holds its shape, and cooling completely keeps the Kisses firm.
Stored in an airtight container at room temperature, they last 3-4 days. Refrigerating extends freshness up to a week, and freezing preserves them for 2-3 months.
Final Thoughts
Making the Strawberry Kiss Sugar Cookies Recipe is such a joyful experience—breaking through the sticky dough, coating it in sparkly sugar, and topping it with those luscious strawberry kisses. Whether you serve them warm and gooey or cooled and firm, these cookies always feel like a special celebration. I hope you find just as much happiness in baking and sharing them as I do!
Print
Strawberry Kiss Sugar Cookies Recipe
- Prep Time: 15 minutes
- Optional Chill Time: 30 minutes
- Cook Time: 12 minutes
- Total Time: 57 minutes
- Yield: 18 cookies
- Category: Dessert
- Method: Baking
- Cuisine: American
- Diet: Vegetarian
Description
Strawberry Kiss Cookies are delightful sugar cookies made with Funfetti sugar cookie mix, rich cream cheese, and topped with a sweet Hershey’s Strawberry Ice Cream Cone Kiss. These cookies are soft, festive, and perfect for any occasion. Coated in pink or white sanding sugar or non-pareils, they strike the perfect balance of sweetness and a fun texture, making them irresistible treats to enjoy warm or cooled.
Ingredients
Cookie Dough
- 16 ounce bag Funfetti Sugar Cookie Mix
- 4 ounce cream cheese, softened (½ 8-ounce package)
- 1 large egg
Coating and Topping
- ½ cup pink or white sanding sugar or non-pareils
- 18 Hershey’s Strawberry Ice Cream Cone Kisses, unwrapped
Instructions
- Preheat Oven and Prepare Baking Sheet: Line a large baking sheet with parchment paper and preheat the oven to 375 degrees Fahrenheit to ensure even baking.
- Make the Dough: In a large mixing bowl, use a hand or stand mixer to beat together the Funfetti sugar cookie mix, softened cream cheese, and one large egg until fully combined into a soft dough.
- Prepare the Coating: Pour the pink or white sanding sugar or non-pareils into a shallow bowl ready for coating the cookie dough balls.
- Scoop and Coat the Dough: Use a 1 ½ tablespoon cookie scoop to scoop out balls of dough. Drop each ball into the bowl of sanding sugar or non-pareils and gently roll until evenly coated and smooth.
- Optional Chill for Easier Handling: If the dough feels too sticky to scoop and roll easily, refrigerate or freeze it for 30-60 minutes. This step is optional but helps in handling the dough better.
- Arrange on Baking Sheet: Place the coated cookie dough balls on the prepared baking sheet, spacing about 1 ½ inches apart to allow for spreading during baking.
- Bake the Cookies: Bake in the preheated oven for 12 minutes or until the edges are set and cookies appear firm but still soft in the center.
- Cool and Add Strawberry Kisses: Let the cookies cool on the baking sheet for 3-5 minutes, then gently press one unwrapped Hershey’s Strawberry Ice Cream Cone Kiss into the center of each cookie.
- Final Cooling and Serving: Transfer the cookies to a cooling rack to cool completely, or serve warm if you prefer the Kisses slightly melted and gooey.
Notes
- Store cooled cookies in an airtight container at room temperature for 3-4 days.
- Refrigerate cookies for up to 1 week or freeze for 2-3 months to extend freshness.
- Avoid covering or storing warm cookies as this can deform the chocolate kisses.
- Chilling the dough makes it easier to handle and less sticky before scooping.
- Coating hands and the cookie scoop lightly with sanding sugar can prevent sticking when shaping dough balls.
- The cooling time before adding the Kisses affects their softness: pressing them in immediately results in melted, softer kisses; longer cooling keeps kisses firmer.
- Use sanding sugar if you want a sparkly, textured coating; non-pareils add color and crunch but don't help with sticky dough handling.
Nutrition
- Serving Size: 1 cookie
- Calories: 120 kcal
- Sugar: 10 g
- Sodium: 90 mg
- Fat: 6 g
- Saturated Fat: 3 g
- Unsaturated Fat: 2 g
- Trans Fat: 0 g
- Carbohydrates: 15 g
- Fiber: 0.5 g
- Protein: 1 g
- Cholesterol: 15 mg


Leave a Reply