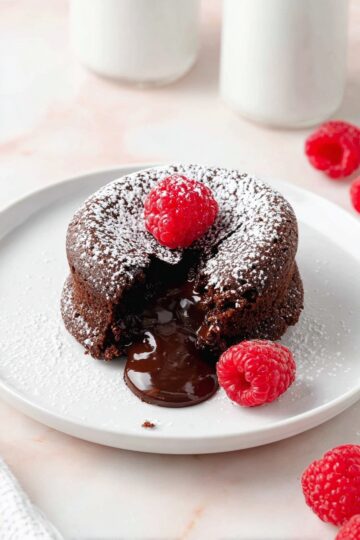
If you love the magical combination of rich chocolate and creamy peanut butter, you’re going to flip for this Peanut Butter Chocolate Lava Cakes Recipe. These individual molten cakes offer that perfectly gooey center, baked fresh in under 35 minutes—a dreamy indulgence without the fuss.

Jump to:
Why You'll Love This Recipe
Honestly, I can’t get enough of these lava cakes. The way that molten chocolate oozes out the moment you cut into the cake—combined with that hit of creamy peanut butter—feels like a little celebration with every bite.
- Super Easy Prep: You’ll whip this up quickly with just a few simple ingredients right in your own kitchen.
- Molten Goodness: Each cake delivers a gooey, lava-like center that’s pure comfort dessert magic.
- Peanut Butter Twist: The subtle peanut butter filling adds a creamy contrast that pairs beautifully with deep chocolate.
- Perfectly Portion-Controlled: Making four individual cakes means no fighting over slices—everyone gets their own!
Ingredients & Why They Work
Before you start, make sure to grab good-quality semi-sweet chocolate (think Lindt or Ghirardelli) because that really makes the difference here. Also, stick to classic creamy peanut butter like Jif or Skippy for the best melty texture inside these cakes.
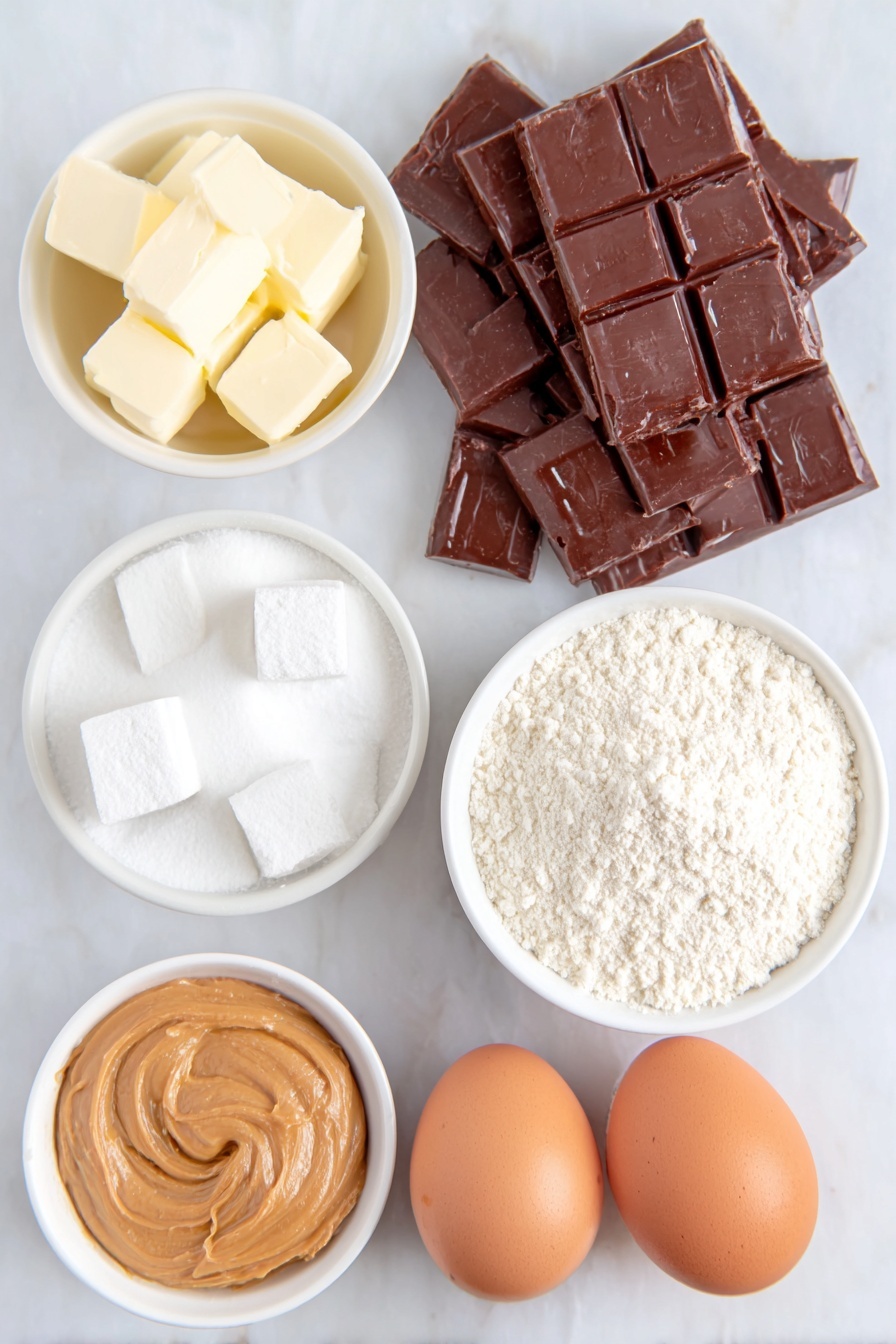
- High quality semi-sweet chocolate: This provides a rich, smooth chocolate flavor and melts evenly for that perfect lava center.
- Unsalted butter: Adds creaminess and helps the batter achieve the right texture without overpowering saltiness.
- All-purpose flour: Just enough to give the cake structure while keeping it tender and moist.
- Confectioners’ sugar: For sweetness that blends effortlessly into the batter, giving a light, delicate crumb.
- Salt: To balance the sweetness and deepen the chocolate flavor.
- Large eggs and egg yolks: These make the cakes tender with a rich, custard-like quality.
- Creamy peanut butter: The star filling that melts into the center, adding a nutty, luscious surprise.
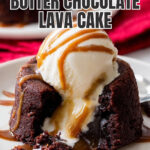
- Optional toppings: Ice cream, melted peanut butter, or chocolate syrup take these lava cakes from great to absolutely gourmet.
Make It Your Way
One of the best parts about this Peanut Butter Chocolate Lava Cakes Recipe is how easy it is to tweak to match your preferences or whatever you have on hand. Feel free to get creative or keep it classic—the gooey molten center is always a winner!
- Classic Variation: If you’re not a peanut butter fan or have guests with allergies, simply skip the peanut butter filling and bake as directed for a perfectly rich molten chocolate cake. I’ve done this often for a crowd with great success—sometimes less is more!
- Muffin Pan Version: No ramekins? No problem! Using a muffin pan yields 6 smaller cakes. They bake faster, in about 8 to 10 minutes, and are perfect for a party where everyone wants their own little cake.
- Serving Ideas: Top with a scoop of vanilla ice cream for a hot-and-cold contrast, drizzle some melted peanut butter for extra indulgence, or add a swirl of chocolate syrup to amp up the chocolate love. I’m especially partial to the ice cream and a little peanut butter drizzle—it’s pure magic!
- Peanut Butter Tips: Use creamy commercial peanut butter like Jif or Skippy for the best texture and smooth molten center. Avoid natural or crunchy varieties to keep the lava flow silky and consistent.
Step-by-Step: How I Make Peanut Butter Chocolate Lava Cakes Recipe
Step 1: Prep Your Ramekins for Easy Release
Start by spraying four 6-ounce ramekins with a nonstick cooking spray. Then, dust them with cocoa powder. This little extra step guarantees your cakes slide out smoothly once baked, preventing any sticky mess or broken edges. Trust me, taking a couple of minutes here saves frustration and keeps your lava cakes picture-perfect.
Step 2: Preheat the Oven to 425°F (218°C)
Get that oven nice and hot so it’s ready to work its magic as soon as your batter is prepared. The high temperature is key to forming that delicate firm shell around the molten center. While waiting, move on to melting your chocolate and butter.
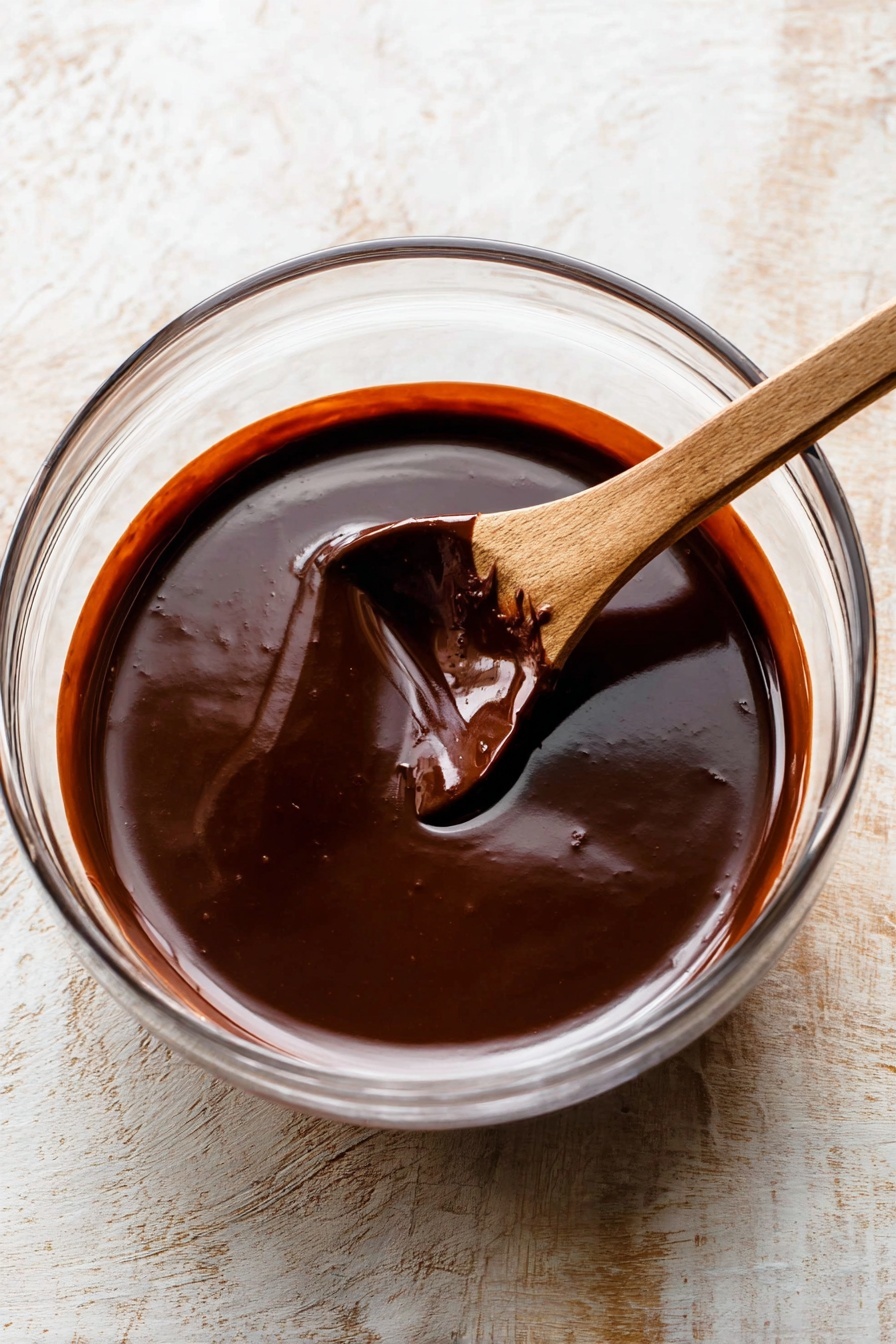
Step 3: Melt Chocolate and Butter Together
Coarsely chop 6 ounces of high quality semi-sweet chocolate and place it in a medium heatproof bowl on top of ½ cup unsalted butter. Microwave in short 10-second bursts, stirring between each, until the mixture is completely smooth and glossy. This ensures even melting and prevents burning. Set it aside while you prep the dry ingredients.
Step 4: Combine Dry and Wet Ingredients
Whisk ¼ cup all-purpose flour (spooned & leveled), ½ cup confectioners’ sugar, and ⅛ teaspoon salt together in a small bowl. In another bowl, whisk together 2 large eggs and 2 large egg yolks until smooth and uniform. Gradually add both the flour mixture and eggs into your melted chocolate, gently folding with a spatula or wooden spoon. If lumps appear, just whisk gently to smooth them out—your batter will be thick but silky.
Step 5: Fill Ramekins and Add the Peanut Butter Surprise
Divide the chocolate batter evenly among the prepared ramekins. Then, spoon about 2 teaspoons of creamy peanut butter onto the center of each cake and press it lightly into the batter. Some of the peanut butter should peek through the top—that’s the gooey center we’re after!
Step 6: Bake Your Lava Cakes to Perfection
Set your ramekins on a baking sheet and pop them into the oven. Bake for 12 to 13 minutes until the edges are firm and set but the tops still look just a bit soft. This balance ensures the molten peanut butter and chocolate center remains delightfully flowing.
Step 7: Cool Slightly and Invert Carefully
Let the cakes cool for exactly 1 minute—just enough to firm up the edges so they hold shape but stay warm and molten inside. Cover each ramekin with an inverted plate, put on oven mitts (those ramekins are hot!), and flip gently. The cakes should slide right out onto your serving plates, showing off their perfect lava centers.
Step 8: Add Toppings and Serve Immediately
Top your molten cakes with optional ice cream, a drizzle of melted peanut butter, or chocolate syrup—whatever makes your heart sing. Serve them right away to savor the warm, molten center at its most irresistible. Don’t forget a big smile alongside your plate!
Side Dishes
This dessert shines on its own but pairs wonderfully with fresh berries like strawberries or raspberries to add a bright, tart contrast. A refreshing mint leaf or a simple dollop of whipped cream can also balance the richness without overpowering the cake.
Make Ahead and Storage
Storing Leftovers
If you have any leftover cakes (though they’re tough to resist!), store them covered tightly in the refrigerator for up to 2 days. The molten center will firm up, so these are best enjoyed fresh, but refrigerated cakes can still be reheated to recapture that gooey texture.
Freezing
You can freeze these lava cakes unbaked after preparing the batter and filling the ramekins but before baking. Cover the ramekins tightly with plastic wrap and freeze for up to 1 month. When ready to bake, let them thaw in the refrigerator overnight and then bake as usual.
Reheating
To warm refrigerated or thawed cakes, microwave each for 20 to 30 seconds until the center is molten again but the cake is just warmed through. Avoid overheating to prevent the cake from drying out or losing that luscious molten texture.
Frequently Asked Questions:
For the best results, stick with commercial creamy peanut butter like Jif or Skippy. Natural or crunchy peanut butters don’t melt as smoothly and can affect the texture and baking performance of the lava cakes.
No worries! You can use a muffin pan instead. Just grease and dust with cocoa powder, spoon in the batter, and bake for 8 to 10 minutes at 425°F. This will make 6 smaller cakes instead of 4.
Look for firm and set edges with tops that are still slightly soft to the touch. The baking time of 12 to 13 minutes is your guide, but oven variances mean you may want to check a bit earlier or later.
Absolutely! Prepare the batter up to step 4, then cover and refrigerate for up to 1 day. Bring to room temperature before adding the peanut butter and baking.
Final Thoughts
Making Peanut Butter Chocolate Lava Cakes Recipe at home is a delightful way to treat yourself or your loved ones. The luscious molten center paired with creamy peanut butter creates a cozy, indulgent experience that’s surprisingly simple to pull off. Once you master the technique and find your favorite toppings, you’ll have a go-to dessert that's sure to impress—so don’t be shy to bake these again and again!
Print
Peanut Butter Chocolate Lava Cakes Recipe
- Prep Time: 15 minutes
- Cooling Time: 1 minute
- Cook Time: 13 minutes
- Total Time: 35 minutes
- Yield: 4 cakes
- Category: Dessert
- Method: Baking
- Cuisine: American
- Diet: Vegetarian
Description
Deliciously rich and gooey Peanut Butter Chocolate Lava Cakes featuring a molten chocolate center combined with creamy peanut butter. Perfect for an indulgent dessert that's easy to make with simple ingredients and baked to perfection in just over half an hour.
Ingredients
Chocolate Batter
- 6 ounces high quality semi-sweet chocolate
- ½ cup unsalted butter
- ¼ cup all-purpose flour (spooned & leveled)
- ½ cup confectioners’ sugar
- ⅛ teaspoon salt
- 2 large eggs
- 2 large egg yolks
Filling
- 8 teaspoons creamy peanut butter (about 2 teaspoons per cake)
Optional Toppings
- Ice cream
- Melted peanut butter
- Chocolate syrup
Instructions
- Prepare Ramekins: Spray 4 6-ounce ramekins with nonstick cooking spray and dust them with cocoa powder to ensure the cakes release easily after baking.
- Preheat Oven: Set your oven to 425 degrees Fahrenheit to reach the ideal baking temperature.
- Melt Chocolate and Butter: Coarsely chop the chocolate and place it on top of the butter in a medium heatproof bowl. Microwave in 10 second increments, stirring after each, until fully melted and smooth. Set aside.
- Mix Dry and Wet Ingredients: Whisk together flour, confectioners' sugar, and salt in a small bowl. In another bowl, whisk eggs and egg yolks until combined. Gradually add both mixtures to the melted chocolate and gently stir with a spatula or spoon until smooth and slightly thick, removing any lumps with a whisk.
- Fill Ramekins: Evenly spoon the chocolate batter into the prepared ramekins. Top each with 2 teaspoons of creamy peanut butter and press slightly into the batter, allowing some peanut butter to remain visible.
- Bake: Place the ramekins on a baking sheet and bake for 12 to 13 minutes until the sides are firm but the tops remain slightly soft.
- Cool and Invert: Let the cakes cool for 1 minute, then cover each ramekin with an inverted plate and carefully flip using oven mitts. The cakes should easily release.
- Serve: Top with optional ice cream, melted peanut butter, or chocolate syrup as desired. Serve the lava cakes immediately for the best molten texture.
Notes
- The batter can be made through step 4 ahead of time; cover and refrigerate up to 1 day. Bring to room temperature before proceeding.
- Use commercial creamy peanut butter brands like Jif or Skippy; avoid natural, crunchy peanut butter or other nut butters.
- For plain lava cakes without peanut butter, omit the peanut butter and bake as directed for 12 to 13 minutes.
- If you don’t have 6-ounce ramekins, use a muffin pan greased and dusted with cocoa powder; bake for 8 to 10 minutes, yield increases to 6 smaller cakes.
- 6-ounce ramekins are standard and suitable for other desserts like custards and mousse recipes.
- Use oven mitts carefully when inverting hot ramekins to prevent burns.
Nutrition
- Serving Size: 1 cake
- Calories: 420 kcal
- Sugar: 32 g
- Sodium: 120 mg
- Fat: 28 g
- Saturated Fat: 12 g
- Unsaturated Fat: 14 g
- Trans Fat: 0.5 g
- Carbohydrates: 38 g
- Fiber: 4 g
- Protein: 7 g
- Cholesterol: 145 mg

Leave a Reply