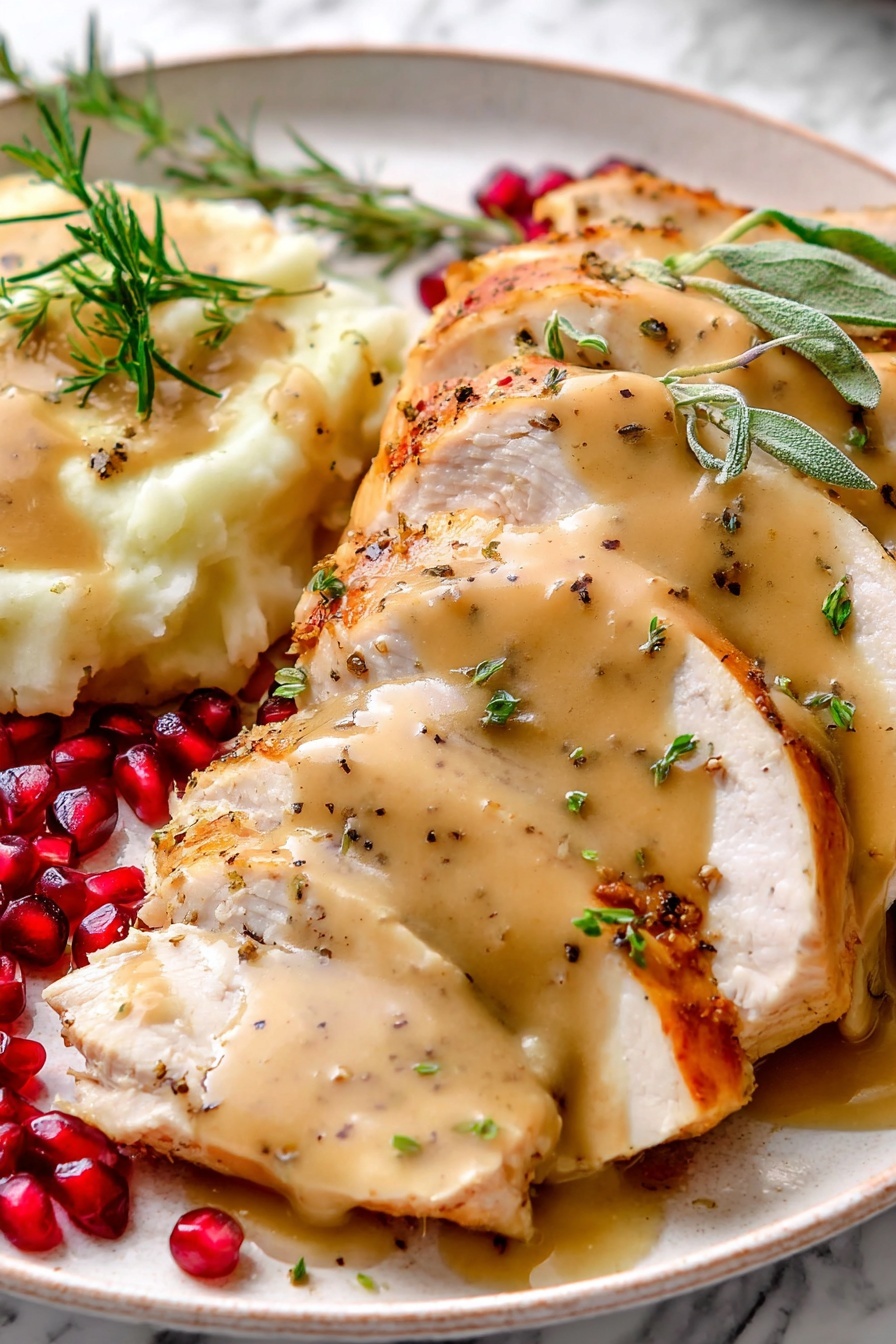
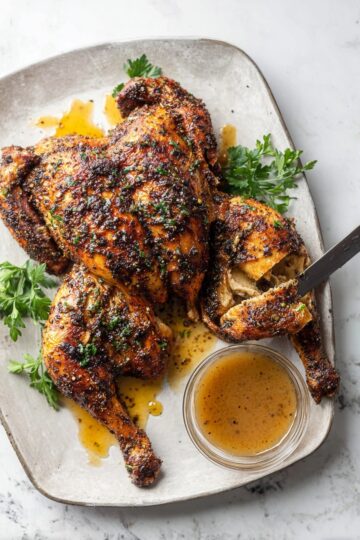
There’s something utterly satisfying about dripping-rich sauce ladled over a turkey plate. This Homemade Turkey Gravy from Drippings Recipe taps into those deep, savory flavors that only come from roasting a turkey yourself. Trust me, once you master this, store-bought gravy won’t even cross your mind.

Jump to:
- Why You'll Love This Recipe
- Ingredients & Why They Work
- Make It Your Way
- Step-by-Step: How I Make Homemade Turkey Gravy from Drippings Recipe
- Top Tip
- How to Serve Homemade Turkey Gravy from Drippings Recipe
- Make Ahead and Storage
- Frequently Asked Questions:
- Final Thoughts
- Homemade Turkey Gravy from Drippings Recipe
Why You'll Love This Recipe
This Homemade Turkey Gravy from Drippings Recipe has been my go-to for years—and I’m excited to share why it’s a total game-changer. There’s just nothing like gravy made from those golden bits leftover in your roasting pan, and it’s easier than you think to pull off.
- Real Flavor Boost: Using turkey drippings gives this gravy an unmatched depth and richness.
- No Lumps Every Time: The key roux technique here ensures a silky smooth finish—no more clumpy horror stories.
- Flexible and Forgiving: You can tweak seasonings to fit your family's taste buds perfectly.
- Perfect Timing: I’ll guide you on how to keep your gravy warm and fresh for serving, so it’s never dry or thick.
Ingredients & Why They Work
The magic behind this Homemade Turkey Gravy from Drippings Recipe really comes down to simple pantry staples paired beautifully with those precious turkey drippings. Each ingredient plays a vital part in creating a luscious, well-balanced sauce that feels homemade yet restaurant-worthy.
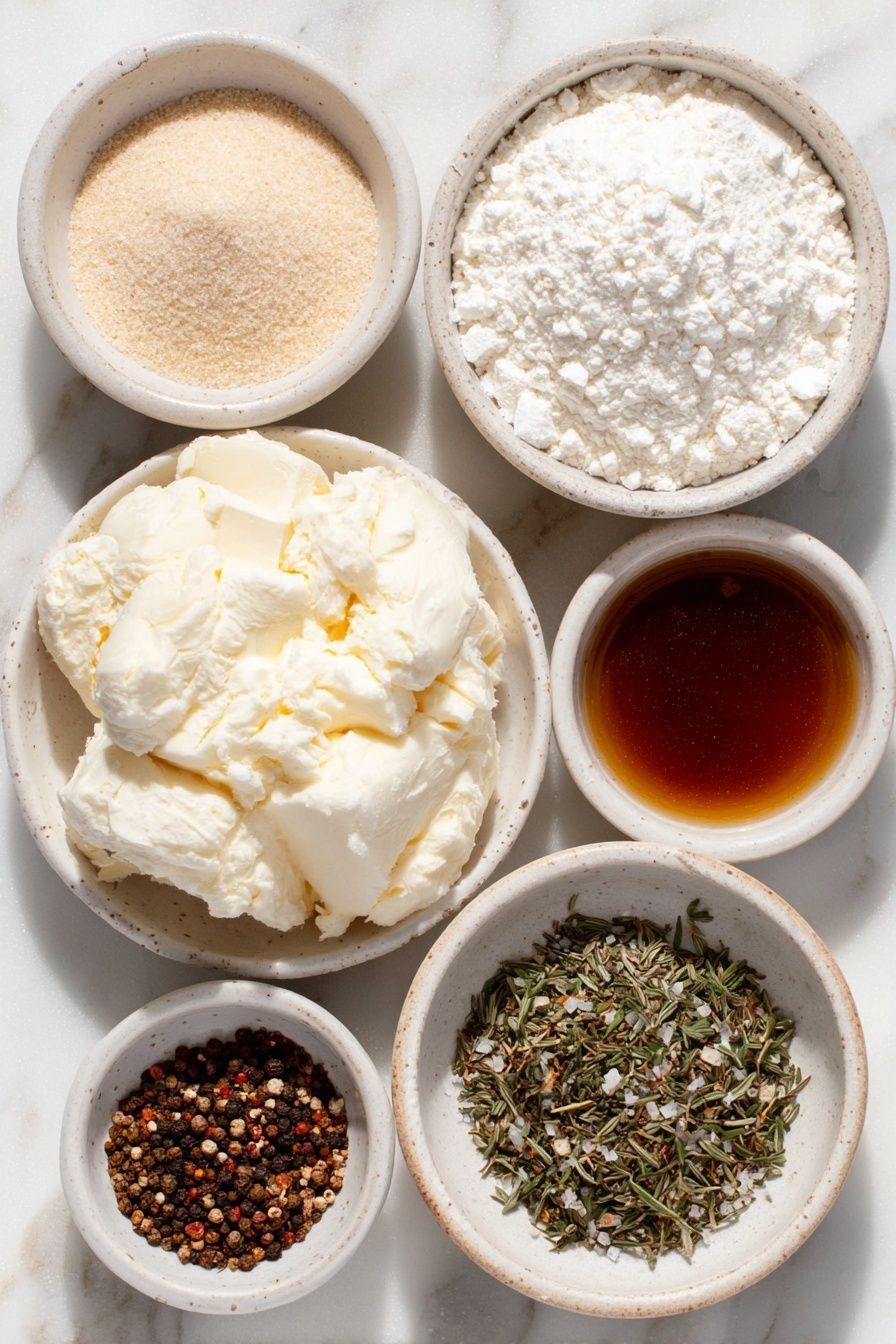
- Unsalted Butter: A neutral fat that helps build the roux without overpowering the delicate turkey flavor.
- All-Purpose Flour: Thickens the gravy perfectly while cooking out the raw flour taste.
- Turkey Drippings: The star ingredient! These carry all the roasted turkey’s juices and browned bits, packing in incredible flavor.
- Water: Used to top off the liquid if your drippings don’t quite make 4 cups—important to keep the consistency just right.
- Granulated Chicken Bouillon (Optional): A handy seasoning booster that helps you avoid over-salting.
- Dried Herbs & Spices: Parsley, garlic powder, onion powder, thyme, sage, rosemary, and pepper add that extra herbaceous warmth.
Make It Your Way
I love making this Homemade Turkey Gravy from Drippings Recipe my own depending on the meal or the guests. Some days, I dial up the herbs; other times, I keep it pure and simple so the drippings shine through. You should absolutely feel free to experiment and make the gravy exactly how you like it.
- Variation: Once, I added a splash of white wine to the drippings before whisking in the roux—and wow, it brought a subtle tangy depth that my family adored.
- Dietary tweak: Need gluten-free? Swap the all-purpose flour for a gluten-free blend or cornstarch—just adjust cooking times accordingly.
- Herb twist: Fresh rosemary or thyme sprigs work wonders, especially when added in the final simmering stage for a fragrant lift.
Step-by-Step: How I Make Homemade Turkey Gravy from Drippings Recipe
Step 1: Strain and Skim the Drippings
Once your turkey is out of the roasting pan, pour all the drippings—both liquid and solids—through a fine mesh sieve into a fat separator or a large freezer bag. Let it sit a few minutes so the fat rises to the top. If using a bag, snip a tiny hole in one corner and drain the bottom liquid fat-free into a measuring cup until you have 4 cups total. Don’t rush this step; it’s vital to keep your gravy silky, not greasy.
Step 2: Create the Golden Roux
In a large saucepan over medium-low heat, melt 6 tablespoons of unsalted butter. Stir in the flour (about ⅓ cup + 1 tablespoon) and cook for about 4 to 5 minutes, whisking constantly until it’s a beautiful deep golden color. This step makes a world of difference in flavor and smoothness, so don’t skip or rush it.
Step 3: Whisk in the Turkey Drippings
Slowly pour your defatted turkey drippings into the roux while whisking continuously to prevent lumps. Once combined, increase the heat slightly and bring the mixture to a gentle simmer. This is when the magic happens—the gravy will start to thicken beautifully.
Step 4: Season and Simmer to Perfection
Simmer your gravy for about 6 to 8 minutes, whisking frequently, until it reaches your desired thickness. If the gravy seems too thick, whisk in a splash of water a little at a time. Taste it, and then season with salt, pepper, and if you like, a pinch of granulated chicken bouillon for that perfect savory balance. Add dried herbs like parsley, thyme, sage, rosemary, onion, and garlic powder as you like, tasting along the way.
Step 5: Keep Warm and Serve
Gravy holds best when warm, so I usually keep it on low heat until the turkey is sliced and the sides are ready. Stir it often. It thickens as it cools, so if you need to thin it out, gently reheat with a little water added while whisking. Serve it in a nice insulated gravy jug to keep it cozy on the table—it’s a small touch that makes a big difference.
Top Tip
I’ve made this Homemade Turkey Gravy from Drippings Recipe dozens of times, and the difference between a clumpy mess and a velvety gravy is all in the roux and whisking technique. Here are some golden nuggets I’ve learned along the way to help you nail it every time.
- Patience is Power: Cook your roux slowly and don’t skip the golden stage—it builds flavor and ensures smooth texture.
- Whisk Continuously: When adding your drippings, keep that whisk moving to avoid lumps forming.
- Use a Fat Separator or Freezer Bag: This makes fat removal so much easier and keeps your gravy from being greasy.
- Taste as You Go: Season gradually so you don’t overdo salt; granulated chicken bouillon can help balance flavors gently.
How to Serve Homemade Turkey Gravy from Drippings Recipe
Garnishes
I personally like to sprinkle a little freshly chopped parsley on top right before serving—not just for a pop of green, but also because it adds a light herbal note that cuts through the richness beautifully. Sometimes, a tiny dash of freshly cracked black pepper on top finishes it off perfectly.
Side Dishes
This Homemade Turkey Gravy from Drippings Recipe shines alongside classic mashed potatoes, roasted vegetables, and stuffing. I especially love drizzling it over buttery mashed Yukon Golds—the gravy soaks in and makes every bite feel indulgent.
Creative Ways to Present
For special occasions, try serving the gravy warm in individual mini gravy boats or small ramekins at each plate—your guests will love the personal touch. You can also add a sprig of fresh thyme or rosemary to the side of the serving jug for an elegant, aromatic presentation.
Make Ahead and Storage
Storing Leftovers
Once you've enjoyed the feast, I like to pour leftover gravy into an airtight container and pop it in the fridge. It keeps beautifully for up to 4 days. Label it because, trust me, you’ll want to remember this rich, luscious sauce for sandwiches and next-day potatoes!
Freezing
I’ve frozen this gravy several times with great success. Use a freezer-safe container or freezer bags with air squeezed out. It will keep for up to 3 months. When you’re ready to use it, thaw it slowly in the fridge overnight—this method preserves the flavor and texture.
Reheating
Reheating is simple and works best on the stove over low to medium heat. As it warms, whisk in small amounts of water to loosen it back up to the consistency you love, stirring constantly to keep it silky smooth.
Frequently Asked Questions:
Absolutely! If you don’t have turkey drippings, use a good quality, reduced-sodium chicken broth and follow the same roux and seasoning process. It won’t be quite the same depth, but it’s still delicious.
The key is to cook your roux properly and add liquid slowly while whisking continuously. Also, using a fine mesh strainer on your drippings helps remove any bits that could cause clumps.
Yes, you can make the gravy ahead and keep it warm on very low heat, stirring often. Alternatively, make it completely and refrigerate or freeze. Just reheat gently when ready to serve.
If it’s too thick, gradually whisk in water or broth to loosen it. If it’s too thin, keep simmering while whisking until it reduces to your preferred consistency. Patience here is key.
Final Thoughts
This Homemade Turkey Gravy from Drippings Recipe holds a dear spot in my holiday cooking tradition. It’s that perfect finishing touch that pulls the whole meal together with rich flavor and homemade goodness. I hope you find as much joy in making it as I do—once you taste it, I’m pretty sure you’ll agree it’s gravy at its finest. So pull out that roasting pan and let’s make some magic!
Print
Homemade Turkey Gravy from Drippings Recipe
- Prep Time: 5 minutes
- Cook Time: 15 minutes
- Total Time: 20 minutes
- Yield: 2.5 cups
- Category: Sauce
- Method: Stovetop
- Cuisine: American
Description
This homemade turkey gravy recipe uses rich turkey drippings to create a deeply flavorful sauce perfect for accompanying roasted turkey. The method involves making a golden roux, then whisking in the drippings and simmering until thickened. A no-drip version using chicken broth and seasonings is also included for convenience.
Ingredients
Turkey Gravy with Drippings
- 6 tablespoons unsalted butter
- ⅓ cup + 1 tablespoon all-purpose flour
- 4 cups turkey drippings plus water as needed
- Granulated chicken bouillon, as needed (optional)
- Seasonings as needed (dried parsley, garlic powder, onion powder, dried thyme, ground sage, dried minced rosemary, pepper, salt)
Turkey Gravy without Drippings
- 6 tablespoons unsalted butter
- ⅓ cup + 1 tablespoon all-purpose flour
- 4 cups reduced sodium chicken broth
- 1 teaspoon chicken bouillon (granulated, crushed cube or base)
- 1 teaspoon dried parsley
- ½ teaspoon garlic powder
- ¼ teaspoon onion powder
- ¼ teaspoon dried thyme
- ¼ teaspoon pepper
- ⅛ teaspoon ground sage
- ⅛ teaspoon dried minced rosemary
- Salt to taste
Instructions
- Strain the drippings: Strain the turkey drippings through a fine mesh sieve to remove solids, collecting the liquid and fat in a fat separator or a large freezer bag for degreasing.
- Degrease the drippings: Allow the drippings to rest so fat rises to the top, then carefully pour out the fat-free liquid from the bottom using a cut corner of the freezer bag, aiming to have 4 cups total liquid. Add water if necessary.
- Make the roux: Melt butter in a large saucepan over medium-low heat. Add flour and cook, whisking constantly, for 4-5 minutes until it turns deeply golden to prevent lumps.
- Whisk in drippings or broth: Reduce heat to low and slowly whisk the turkey drippings or chicken broth into the roux until smooth and lump-free.
- Simmer the gravy: Bring the mixture to a simmer while whisking constantly, and cook for 6-8 minutes until thickened. Remember it will thicken more as it cools, so adjust consistency if needed by whisking in water.
- Season the gravy: Taste and add granulated chicken bouillon, salt, and seasonings like dried parsley, garlic powder, onion powder, thyme, sage, rosemary, and pepper in small increments to suit your preference.
- Keep warm until serving: Keep the gravy on low heat, stirring often to maintain smoothness. Serve warm in an insulated gravy jug for best texture.
- Reheat and thin if needed: If the gravy thickens too much upon cooling, reheat gently over medium-low heat and whisk in water to restore desired consistency before serving.
Notes
- To store leftover gravy, transfer it to an airtight container and refrigerate for up to 4 days.
- For freezing, place gravy in airtight containers or freezer bags, remove excess air, and freeze for up to 3 months. Thaw overnight in the refrigerator before reheating.
- Reheat gravy gently in a saucepan until warm, adding water as needed to thin and whisking until smooth.
- Do not shortcut cooking the roux; browning it deeply prevents lumps in the gravy.
- Adjust seasonings gradually to achieve balanced flavor based on the saltiness of your drippings or broth.
- Keep gravy warm and stir often to maintain a smooth texture before serving.
Nutrition
- Serving Size: ¼ cup
- Calories: 90 kcal
- Sugar: 0 g
- Sodium: 200 mg
- Fat: 6 g
- Saturated Fat: 3.5 g
- Unsaturated Fat: 2.5 g
- Trans Fat: 0 g
- Carbohydrates: 7 g
- Fiber: 0 g
- Protein: 1 g
- Cholesterol: 20 mg

Leave a Reply